Well, I guess that title is a little off. Let me re-word it to say "Our Chicken Coop That Is Free Except for Labor and Hardware". Okay, maybe I still better clarify: What
was free? Well, we are still in process, but this is what we have collected so far via friends, Freecycle, and various yahoo message boards:
*An old rabbit hutch in which we can solidify the walls and floor for a chick brooder
*4 sheets of corrugated tin roofing
*18-1x6" fence slats
*6-4x4" fence posts
*2-2x4's
*2 pallets
*miscellaneous small plywood scraps 3ft or less
*2 pieces of 1/2" plywood 4'x39" and 57"x19"
*1-2x6", 8 ft long
*Gobs (yes I think "gobs" is a legitimate measurement) of thick plastic sheeting
*A partial roll of rubber matting
*Approximately 50' of chain link fencing
*And the biggie of them all
12, yes TWELVE(!), hollow core, birch sliding closet doors! The hollow core will be perfect as the air gap should provide extra insulation on the walls. We plan to double layer them.
THANK YOU LORD!! (And all the willing, generous people of Juneau!)
 |
| Father and Son tying down the fence slats given to us by generous friends |
 |
| Teamwork training! |
Now comes the daunting task of organizing all this hodge podge into a practical building plan. After vacillating between upright, shed-looking coops to re-purposed camper shells to A-Frames, we decided on the last. Since we have all of those nice long doors it will be simple to build an A-Frame with minimal framing and piecing (I know, famous last words). Also, it should have a lower windload (important during those September storms), and can be easily tailored and modified as we go. For those of you who have never seen an A-Frame coop, it looks something like this:
Now this coop is designed to hold 2-3 hens. We are planning on a longer, taller coop that will comfortably house 6 cluckers. Also, we are disregarding the triangular run in lieu of a large fenced pen that my children and I can enter to clean and interract with the 'girls'. These chickens will be our family pets for the next few years, so we want to be sure that we can be comfortable...well, as comfortable as possible around the stinky manure. : (
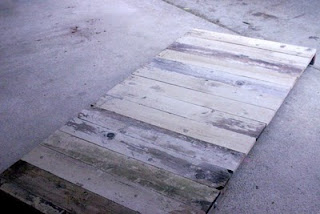
I am not going to show you all the plans we've drawn up right now. It would be pointless, because I do not think you would be able to understand my amateur chicken-scratch (no pun intended) without having the finished visual to help decode with. So, in this case I'll just show you the floor we built yesterday. It is a custom-built pallet of sorts, in which we use 4 of the 4x4 fence posts, 2-2x4's, and 14 of the 1x6 fence slats.
 |
| Note: This shows 13-1x6" cross pieces. We ended up nailing a 2x4 across the ends of the 4x4's to make the short sides of the rectange. This increased the overall length, so we ended up needing an extra fence slat. |
Here are a few photos to show you the work as it was in process. First, the 4x4's were bolted together to make 3, 78" runs. Then we capped each end with a 2x4. Finally we added the fence slats across the top. That's where the kids (and subsequently, the cute photos!) come in. I admit, it's an opportunity for me to brag like the adoring wife and Momma I am.
 |
| Notice how my wise hubby wound duck tape around the hammer's claw. This is to minimize the likelihood of a facial injury on the upward swing. |
 |
| Cutie Carpenter |
 |
| Love the tongue poking out! She's really concentrating on her aim! |
 |
| What a patient, loving Daddy! | |
|
Now for the finished product. After the children got their fill of hammering (a whopping 2 nails each, and then they were off on their bikes), the adults took over.
 |
| Ta-Da!! |
My hubby thinks he has a couple of pieces of 1/4" plywood lined up that we can put on top for easy cleaning. That being said, so far, the lumber was free, and we spent about $15 for the 8" carriage bolts and corresponding washers and nuts. I'll be sure to keep a running tab as we go. My goal is to assemble the entire thing for under $50, but we'll see...
Until then, blessings to you and your homestead!
Hilllary At Home


Love it!
ReplyDelete