Showing posts with label Getting Crafty. Show all posts

Sunday, January 15, 2012

HE #33-Homemade Diaper Bag (With Rainforest Modifications)

So, just a quick recap of what I did today: I attempted to make my own diaper bag, and I'm so glad I did. I used this free pattern from makebabystuff.com.  I was drawn to the idea of using canvas for the bag since I live in a temperate rainforest that sees a lot of inclement weather.  For the most part, I just followed the pattern as-is with the exception of a few mods. They are:

1) On the side of the interior lining that is opposite the zippered pocket, I added an elastic, ruffled pocket that is divided into three sections.  I did this by cutting a length of lining fabric that was double the width of the bag. I sewed a 1 1/2" casing across the top edge and ran a piece of 1" elastic through it that was 1" shorter than the width of the bag. In hindsight, it has a little sag to it, so I should have probably cut the elastic 2" shorter.
Materials to make my ruffled pocket: cut piece of lining, pocket fabric 2x longer than width of lining piece, and elastic.

Both long sides of my lining. One has the ruffled pocket that I sewed into three smaller pockets. The piece on the left is my zippered pocket as shown in the pattern. So far so good!

2) Next, I opted to insert a zipper in lieu of the cute little tab. I have never made a zippered bag before, so I just made up my own method. I used a separating zipper to keep it easy, and then after the bag was assembled, I went back and converted it into a non-separating by whip stitching across both ends of the tracks to block the zipper.

3) From there I pretty much just followed the pattern. She uses a mix of cotton fabric on top of interfacing and canvas for sturdiness. I made my entire exterior out of canvas.  This is how it turned out:
Front side: There is a seam going from the point to the bottom of the bag. On the right of the seam is one large pocket. To the left of the seam is another seam to make two smaller pockets (as shown in the pattern).

The back side of the bag with one large, velcro'd pocket.

Looking on the inside at my ruffled pockets and 'floor' of the bag. I cut a piece of plastic to fit from the plastic that comes in cloth grocery sacks. This just gives it a little more stability and shape. Since this pic was taken, I have since covered it in a 'sleeve' of leftover lining fabric so it blends in.

4) I still have yet to complete my last mod. As with my previous store-bought diaper bags, I plan to spray the exterior with a water repellent coating.  First, I will try it with some of the canvas scraps to make sure it won't mess up the fabric.

**I did notice that my straps were a lot longer than how they appear in the pattern pictures (distorted from my printer?). At first I was resigned to rip them out and shorten them, but then I realized they are the perfect length to wear across my body (like a messenger style) which is what I prefer when I'm carrying a carseat anyway. Yay! However, if you prefer a shorter strap, be sure to take a look at that before attaching to the bag.

Overall, I love my bag, and am SO GRATEFUL to Amber over at makebabystuff.com!  Her pattern is very well laid out and easy to follow. I especially love that she's sharing it with her readers for free :)  Thanks Amber!

Blessings to you and your homestead,
Hillary At Home

Tuesday, January 3, 2012

HE #32- Homemade Baby Mobile For the Crib


Well, I'm going to be a single Mom for a few months while my hubby has been sent to school. That means my winter evenings will be filled with a lot of sewing, knitting, and crafting-mainly in preparation for the arrival of our baby #4 at the end of April! Since I plan to try so many new projects along this theme, I am going to add a new 'Baby Projects' button to my homepage, so keep an eye out! :)

For this project, I went original- as in 'I had an idea on the fly as I was walking the after-Christmas ornament sale aisles and hoped it would look as good in reality as in my head'.  This is in stark contrast to my usual research on various websites and youtube channels before attempting anything.  In this case, I had already decided to decorate the baby's area of our bedroom in vintage-inspired white with red accents that was based on the 2011 calendar I had purchases from Marmee Dear last year.  I loved the red and white sketches, and hated to throw them away. Alas, many are now framed and will hang on the wall above the white spindle crib with white bedding and red accents...

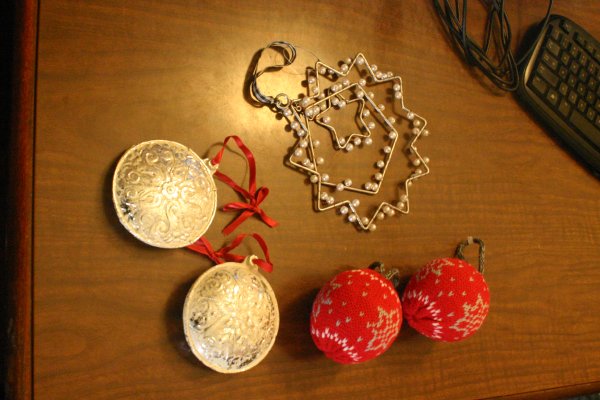
Okay, now getting back to the mobile: I was in the ornament aisle not looking at anything in particular when a pair of foam balls covered in red and white nordic knit caught my eye. Instantly I knew I wanted to incorporate those into my decor. I wasn't sure how, but as I began to take a closer look at the other ornaments, the mobile started to take shape in my mind.  Now after 2 weeks of waiting, I finally got to make it today. It took me about an hour (with children interfering..ahem, I mean 'helping' me), and I am so excited with it!  Here's what I did:

First I got one medium thickness dowel from the craft store. I cut 2-12" lengths. I measured 1" in on each end and drilled a small hole. (I used the smallest bit in the index first as a pilot hole to avoid cracking the dowel. Then I drilled a hole big enough for a large tapestry needle to go through easily. A vice or other person holding the dowel still for you is a BIG help here!)
I didn't think to take a pic of the holes until after I'd already completed the wrapping step, but this gives you an idea of how the drilled holes look.

Next, all those years of making 'God's Eyes' with popsicle sticks at VBS paid off! I took my two lengths and wrapped them securely with red and silver holiday yarn (also on clearance after Christmas) to securely join and cover the dowels sans fabric canopy. It's really important to keep the sticks centered and balanced. Occasionally I would stop wrapping to measure the sticks on either side to make sure they hadn't shifted while wrapping.
Okay, so far so good!
Next, I measured 10" lengths of black and white gingham ribbon. I threaded a large crewel needle with one strip and pulled one end through the drilled hole on the end of a dowel. I triple-knotted it to make sure it was definitely large enough to not pull back through. I used the other end to attach the ornament.  Then I pulled a loop of ribbon through the very center of the cross to attach a large, beaded metal star mobile in the center of the ornaments.  I left it a little longer than the balls.  The white balls I got to coordinate with the knit ones looked a little too plain, so I added ribbon bows to the top of each ball for a little more contrast.

Finally, I attached the musical hook that I scored off an ugly old mobile we had found at the thrift shop some months back. Here was the final test. I held it by the hook (as if suspended off the crib arm) to see if it was balanced enough, and (drum roll please)................it was!  Hooray!!


It hangs! It balances! And it spins to Brahams' Lullaby! What more can I ask for?  All I need to do now is order the arm to attach it to the crib. (I could just attach it from a wall plant hanger or from the ceiling, but I would prefer to add as little holes to the wall of this rent house as possible.)

One thing to keep in mind is the weight of your ornaments. Iniitially I had found these great discs that looked like they had a tarnished mercury finish with scrolled engravings.

While I still would prefer them to the plain white balls, I realized they were ceramic and too heavy. While the hook would probably support them just fine, I did not feel comfortable with the thought of those dangling above my newborn's head!

There are so many other great ideas for homemade mobiles out on the web. I adore this felt owl and tree idea.  Or how about this mod-print pinwheel design?  And remember, mobiles aren't only for babies!

Happy new Year, and Happy Crafting to you and your homestead!
Hillary At Home

Wednesday, November 23, 2011

Homestead Holidays-A Jesse Tree

I was first introduced to the concept of a Jesse Tree a few years ago. However, each year I normally don't think about making one until we are already well into Advent. For those of you who are unfamiliar with this tradition, here is a great demo to explain it all.  This year I happened to catch a link on another website and thankfully my memory was jogged in time to get one ready for this year!

Now my problem was that most of the websites I found offered great layouts for the devotions but only gave you ideas for the crafts-as in 'you need to gather all the different materials and construct 30 ornaments for this tree'.  Hmmm, maybe someday but not this year at my homestead!  I then set off on an internet search to find a good devotional with simple printable ornaments that the kids could color, cut, mount on pretty paper, and laminate.  That quest was much harder than I had anticipated! Some sites had great devotions but no ornaments whereas others had altered the devotions by switching out some of the verses and Bible figures, but offered printable ornaments. Ugh! Couldn't I find the best of both?

Eureka! I finally found it! RCA online offers a very straightforward, free devotional guide here along with printable ornaments here!  Yay! This will give the kids something exciting to do while I prepare Thanksgiving dinner on Thursday, and the goal is to have them ready to begin hanging on our little tree on Sunday.  For our tree, I chose to purchase a small 18" white artificial tree. I wanted it to be in stark contrast to our traditional tree, and I think the white will really help the ornaments to stand out.

If you choose to implement a Jesse Tree into your Christmas countdown this year, I would LOVE to hear your ideas and see pictures!

Holiday Blessings to you and your homestead,
Hillary At Home

Wednesday, May 18, 2011

Tiered Peasant Skirt (Lost and Re-posted!)


I have a new love-affair. The new object of my affection is not men, chocolate, or even money related. It's something of a more textile-nature: Long skirts!   Yes, I already know I'm weird, but maybe I just crossed the cooky line in your opinion of me?  Well, before you close the page, just read the 4 main reasons i appreciate this type of clothing:


1) They hide the scars from my tomboy days.


2) They are easy to take in as my body shrinks (Hallelujah Lord!)


3)They are lightweight and more modest than most of the shorts and skorts on the rack these days.


4)They are just plain fun! I have to admit that I get an Anne Shirley-esque "thrill" when I feel the fabric swish and swirl around my legs. It's just silly goodness.


My dear friend over at Whimsical Wendy has issued a "Sew Along Challenge" for this year: To makeover our wardrobes by recycling natural fibers found in clothing and linens around the house. The April challenge was skirts. Yes, I'm a little behind.  Anyway, she has made a darling wrap skirt that I confess I want to steal. We have similar tastes in feminine, flowy fabric.  Now she's finishing up a ruffled skirt that looks sweet as well.  She found both patterns on Sew Mama Sew.  While I desperately wanted to make the wrap skirt, I have had some problems in making the pattern. While I wait for Wendy to fit me in her busy schedule, I decided to make another skirt that has been calling my name-a tiered skirt. It's quick and simple-my kind of project!

I had first seen the process for making this on the Homestead Blessings-Art of Sewing video. However, since I first watched my video, I have lent it out to various families, and I am not sure where it's at now!  Since I had already gotten my fabric and sewing machine ready, I decided to look online for a similar pattern.  If you google "tiered skirt" or "peasant skirt" you will get quite an assortment of tutorials.  I personally liked the clear cut instruction and pictures found on indietutes blog site.

Rather than use upcycled fabrics from around my house, I decided to raid my overflowing fabric stash. I found three cotton prints left from my quilting days: a brown/cream toile for the top tier, a brown tone-on-tone for the middle, and a blue/brown floral swirl for the bottom.  It went together in under an hour (not counting pre-washing time of course!), and was so easy! You only need to know a straight, zig zag, and basting/gather stitch for this project, as well as how to run elastic through a casing. This is a great beginner's project!  Plus, it can be customized in so many ways.  You can adjust the fabric choices as well as the number and width of tiers.  In fact, the current JoAnn's flyer features this skirt on the cover. It is made with solid and patchwork printed fabrics. There are four narrow tiers, and the third is narrower than the others to make the fourth flare out.  Cute!

If you do give this project a try, be sure to post a picture of your finished result!  I love to gain inspiration from others.
Happy Sewing!
Hillary At Home

Monday, May 9, 2011

Homestead Baby Gift-Hooded Towels

One of my favorite baby gifts to give and receive (!) are hooded towels. I'm not talking about the little infant ones that are paper thin and only fit for a few months, but rather the nice big roomy ones that still fit my soon-to-be 5 year old's noggin.  While these are a little too roomy for a newborn, you will get plenty of use out of them during the toddler and preschool years of their lives.  Since they are such a long-term gift, I especially enjoy giving them as gifts to parents with multiple children. They may not fit the infant right now, but could surely be used with big brother or sister in the mean-time!   Thankfully they are very easy and quick to make; my favorite kind of project!


What you'll need:
A large bath towel, A coordinating Hand-towel, and thread.  That's it!

Now, for the steps:
1) Cut the hand towel in half across the short width of the towel.

2) Take one of the new halves and fold in half again with the cut edge on top. Pin the cut edge closed.

3) Zig zag this closed. Open it back up and you'll see the 'hood' of the towel.

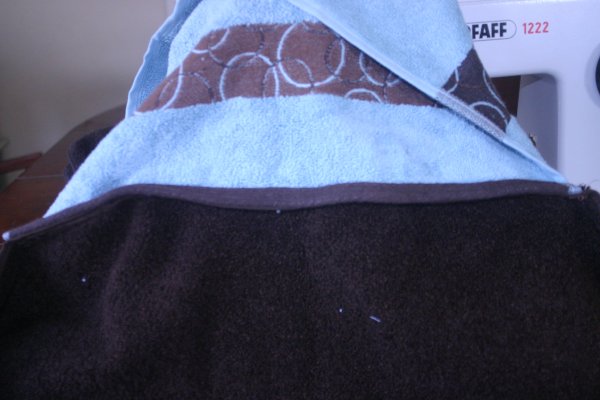
4) Attach the open end of your hood to the middle of the long-side of the bath towel. Voila!  You're all done, and your child will be dry and cozy.
Pin..
...then stitch.

And now good news!  Since you only use half of your hand-towel, you can actually make 2 hooded towels out of it (just buy one more bath-towel).  I made both of these towels in under 15 minutes, but the family can use them for years to come.

Other Variations:
-Run elastic along the inside top of the hood to make it more fitted.

-Use a wash-rag folded in half instead of a hand-towel for a smaller hood that will fit an infant.

-Applique other fabric scraps on it to make an animal face on the hood.  I actually got that idea from an old ducky-towel pattern in a Martha Stewart Baby magazine a few years ago. I can't find that exact one on-line, so here's another link to give you an idea of something similar.

Have fun with this!  You could be as creative as your imagination (and time) allows!
Blessings to you and all the little bundles of joy on your homestead,
Hillary At Home

Monday, April 11, 2011

Homestead Experiment #20-Knitting Critters for the Textile Challenged

Much to my Mother's chagrin, I am not an apt knitter. My chatty, scatterbrained self is too distracted to be able to socially knit.  I would proudly knit rows on my scarf only to have her check it and pronounce that I had dropped several stitches, repeatedly.  Determined, I finally finished that scarf and the two baby blankets I was knitting for my arriving twins, and then hung up my knitting needles up forever. Oh, the tragedy! (Big sigh)

Well, this past December, my friend's Mother was visiting and she was teaching her granddaughters how to loom knit.  After realizing that I would have a frame to actually hold my stitches for me (meaning less likelihood of dropping them-although it still does happen on occasion :), I decided to give knitting one more shot. The result? I got hooked and dragged my 7 year old daughter down into the yarn-y mire with me.  We've made hats and scarves, and my daughter is even making chick hats for the chicks we are planning to get at the end of April! Talk about a project with fairly immediate gratification. It's only four rows of 8 stitches!

A couple of weeks ago, we were in the toy store and saw a kit to make a teddy bear with a loom set. After looking at the back of the box, I realized that I had everything but the smallest round loom (used for making the legs and ears). The parts are basically just tubes that are stuffed and then the ends are gathered to make little sausages. Sew them together with a yarn neeldle. Add a face with embroidery floss (for babies) or buttons, and there you go. Inspired, we ran across the hall to JoAnn's, picked up the loom and some baby chenille, and headed home. Of course, my artistic daughter was not content to just try and make a bear like one on the box we had seen. Oh no! She wanted us to make a bunny rabbit for another friend's newborn daughter. We figured we could make it the same way, but just do long tubes for the ears and leave them unstuffed for a floppy look. Then I figured we'd make a tail with a bunch of loops to adorn the 'bunny buns', and stitch on a face. Yes, we could do this! I was confident-and this is what we made:

The hardest part of this whole thing was sewing on the eyes. I wanted it to be cute and not scary. With these big knit stitches, it was trickier to make a solid spot than I thought it would. For an older child, buttons would definitely be the way to go!

Tail. Sorry for the fuzzy shot. I guess it's a picture of fuzzy buns-literally! :P
I chose white because I figured I could use the same yarn to make white teddy bears for a couple of little boys who will be arriving shortly.  These are just made using the knit stitch only.
 I did begin one recently, using a garter stitch (alternate a row of knits with a row of purls) and do not like the look. As you can see, it has big ridges that go all around it.
I much prefer the knit rows that go up and down.   
After I made the main body tube, stuffed and closed it, I then ran a running stitch around it with a yarn needle and gathered it to make a "neck".

Now, I know this sounds naive and silly, but I hadn't really done much online searching for loom knitting before now.  I was completely content to use the patterns in the books I had purchased that very first day.  However, I decided to go online "just to see if anyone happened to have other ideas" and boy howdy! I didn't realize loom knitting was so popular.  It's very fun, great for kids, and our family definitely gives it a big endorsement!  And, while it seems like it may be better for a cold-weather activitiy, keep it in mind for any long trips you may be taking this summer.  My daughter and I each have a coffee can to keep our current project in (decorated with scrapbooking paper and ribbon of course!), so that kind of gives you an idea of how small it can be. Now granted, the looms can be much larger, but overall it's a pretty compact way to keep hands busy and minds relaxed.

Here are a couple of other sights to get you started:
http://loomknittinghelp.com/

http://www.knittingpatterncentral.com/directory/loom_knitting.php


Happy Wrapping!
Blessings,
Hillary At Home

Tuesday, January 4, 2011

Winter Boredom Buster: Instant Puppet Stage!


I had seen this idea somewhere online or in an article several years ago, and thought it was darling.  I didn't have children at the time, so I just filed it in the 'Later Someday' file of my mind, and you know how that goes...Well, this summer it came roaring back when I found the cutest plush marionette puppets on clearance at our local toy store.  A gift idea for our 4yo's Christmas present began to take shape.  A few weeks later, I found a brand-new package of girlie-themed hand puppets at a garage sale.  Perfect!  Now all I needed was to craft the stage.

All you need for this project is about a yard of heavy fabric (i.e. felt, fleece, etc) and a curtain tension rod that is wide enough to fit across your door frame.  Sew a rod pocket across the top of your fabric, stick the rod in, and pop it into the door frame. That's it! Once you have the supplies rounded up and your sewing machine ready, it takes less than 5 minutes! LOVE that!-Or if you have a left over curtain big enough, just trim and tailor to fit the door.

Of course I had plans to decorate the felt and make it really snazzy with drama masks and lots of glitter, but before I knew it, it was Christmas Eve and I realized "Ugh! I never sewed the stage for dd's gift!"  So, what she got was a plain piece of felt and the promise that she could decorate it later on. :)  Here are some other ideas for a fancier curtain.

This has been a big hit with all three of my kids (7,7, and the 4yo) An added bonus of this design is that we can adjust it to be whatever height needed. So, for hand-puppets we raise it up to block her head and arm.  For the marionettes we lowered it for her to reach over.  Also, I like that we can put it in any standard doorway of the house. So, she can rehearse her shows in her bedroom or upstairs.

Now, if I can only figure out how to get my videos off of my new video camera, I will add in the clips of her very, um, should I say 'dramatic'  first shows?! 

Until then, blessings to you and your at your homestead!
Hillary At Home