

Well, I'm going to be a single Mom for a few months while my hubby has been sent to school. That means my winter evenings will be filled with a lot of sewing, knitting, and crafting-mainly in preparation for the arrival of our baby #4 at the end of April! Since I plan to try so many new projects along this theme, I am going to add a new 'Baby Projects' button to my homepage, so keep an eye out! :)
For this project, I went original- as in 'I had an idea on the fly as I was walking the after-Christmas ornament sale aisles and hoped it would look as good in reality as in my head'. This is in stark contrast to my usual research on various websites and youtube channels before attempting anything. In this case, I had already decided to decorate the baby's area of our bedroom in vintage-inspired white with red accents that was based on the 2011 calendar I had purchases from Marmee Dear last year. I loved the red and white sketches, and hated to throw them away. Alas, many are now framed and will hang on the wall above the white spindle crib with white bedding and red accents...
Okay, now getting back to the mobile: I was in the ornament aisle not looking at anything in particular when a pair of foam balls covered in red and white nordic knit caught my eye. Instantly I knew I wanted to incorporate those into my decor. I wasn't sure how, but as I began to take a closer look at the other ornaments, the mobile started to take shape in my mind. Now after 2 weeks of waiting, I finally got to make it today. It took me about an hour (with children interfering..ahem, I mean 'helping' me), and I am so excited with it! Here's what I did:
First I got one medium thickness dowel from the craft store. I cut 2-12" lengths. I measured 1" in on each end and drilled a small hole. (I used the smallest bit in the index first as a pilot hole to avoid cracking the dowel. Then I drilled a hole big enough for a large tapestry needle to go through easily. A vice or other person holding the dowel still for you is a BIG help here!)
 | |
| I didn't think to take a pic of the holes until after I'd already completed the wrapping step, but this gives you an idea of how the drilled holes look. |
Next, all those years of making 'God's Eyes' with popsicle sticks at VBS paid off! I took my two lengths and wrapped them securely with red and silver holiday yarn (also on clearance after Christmas) to securely join and cover the dowels sans fabric canopy. It's really important to keep the sticks centered and balanced. Occasionally I would stop wrapping to measure the sticks on either side to make sure they hadn't shifted while wrapping.
 | |
| Okay, so far so good! |
Finally, I attached the musical hook that I scored off an ugly old mobile we had found at the thrift shop some months back. Here was the final test. I held it by the hook (as if suspended off the crib arm) to see if it was balanced enough, and (drum roll please)................it was! Hooray!!

It hangs! It balances! And it spins to Brahams' Lullaby! What more can I ask for? All I need to do now is order the arm to attach it to the crib. (I could just attach it from a wall plant hanger or from the ceiling, but I would prefer to add as little holes to the wall of this rent house as possible.)
One thing to keep in mind is the weight of your ornaments. Iniitially I had found these great discs that looked like they had a tarnished mercury finish with scrolled engravings.
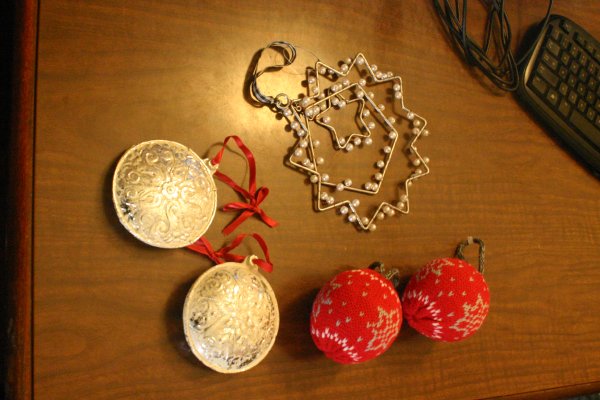
While I still would prefer them to the plain white balls, I realized they were ceramic and too heavy. While the hook would probably support them just fine, I did not feel comfortable with the thought of those dangling above my newborn's head!
There are so many other great ideas for homemade mobiles out on the web. I adore this felt owl and tree idea. Or how about this mod-print pinwheel design? And remember, mobiles aren't only for babies!
Happy new Year, and Happy Crafting to you and your homestead!
Hillary At Home
Like the project! Check out 'My Baby Mobile: virtual & printable stimulation kit' from the app store. It's a DIY mobile with high-contrast graphics for early development using just printer paper and string. Very Eco-friendly. BEST
ReplyDeleteBeautiful mobile. I have a dear friend due in February and you just gave me a wonderful idea for a shower gift.
ReplyDeleteThanks! I would love to see a picture of your finished creation!
ReplyDeleteBlessings,
Hillary